[3.19] Necro Flicker Strike (w/Vaal Detonate Dead!) - >2m DPS on Less than 2 Divine Budget
|
This started as a meme build (Flicker CoC Detonate Dead), but the more I played around with things, the more puzzle pieces fit together.
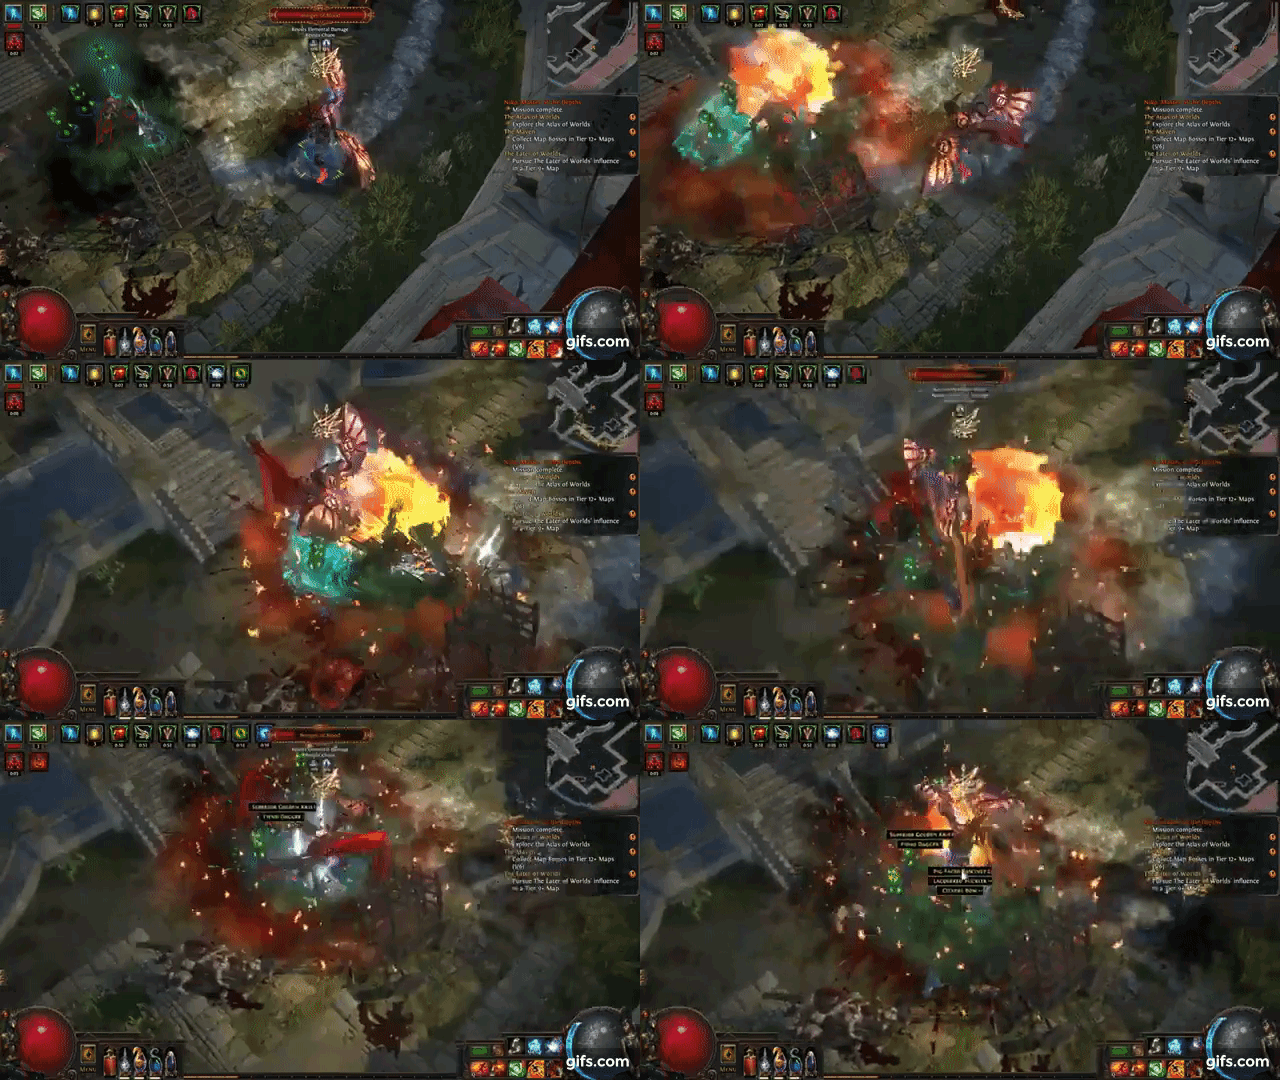 This is NOT a CoC build. This is purely fire damage flicker strike, with Vaal Detonate Dead as additional damage against map bosses.  Essentially, this is a Flicker Strike build that gets a lot of boosts from Necromancy ascendancy. You will gain DPS boosts from consuming corpses, huge amounts of life leech and passive healing every 5s, as well as a pretty viable Vaal Detonate Dead for map bossing. 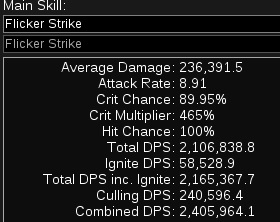 We are using Oro’s Sacrifice because it’s uber-easy to sustain frenzy with ignites (fire damage), and increasing our fire damage will also increase our Vaal Detonate Dead alongside flicker strike. This is a pretty beginner-friendly build. It uses 2 buttons for mapping, and 3 buttons for map bosses. It’s a pretty squishy build, but you will learn a lot about dodging AoE spam. Float like a butterfly, sting like a bee. Note: This build is not pro livestreamer optimized. I'm just a filthy casual map grinder. But I'm sure some build experts out there could take this build to even greater heights. OVERVIEW Pros: + Fairly versatile build with a lot of gear options. + The zoom-zoom mapping of flicker strike we all love. + Vaal Detonate Dead makes rituals and map bosses a breeze. + Witch 2H sword animation is awesome. + Friendly PC performance by passive corpse removal LOL. + Did I mention its Flicker Strike with a viable Vaal Detonate Dead? Cons: - Squishy AF. You’ll die a lot without fast reflexes. - Fire damage scaling leaves a lot to be desired, when you look at other Flicker builds. - Practically no armor/evasion defences. Life leech and Enduring Cry are our saviours in most cases. SKILL TREE PoB: https://pastebin.com/vWrvXWJH You’re basically taking the right side of the tree, but picking up Undertaker notable at the beginning of Witch tree is somewhat important. You can anoint a cheap amulet with Undertaker early on to save a few skill points, then get a better amulet around T12 maps and invest into the Undertaker notable. Individual screenshots with node comments:
스포일러
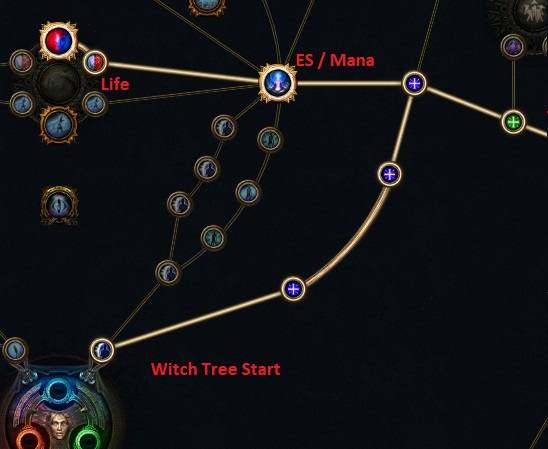 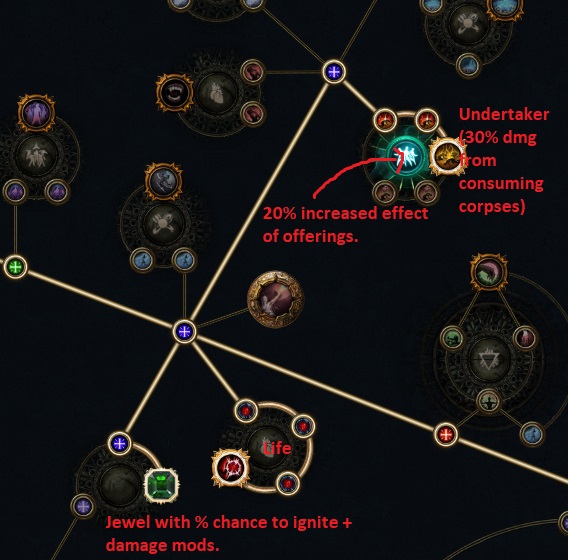 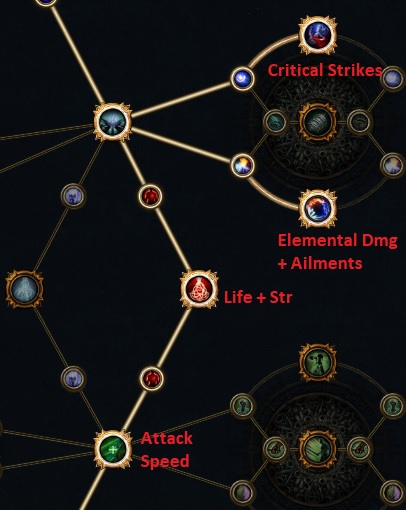 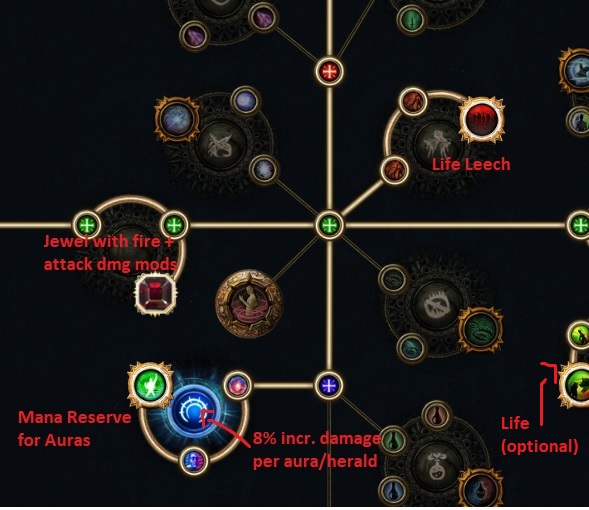  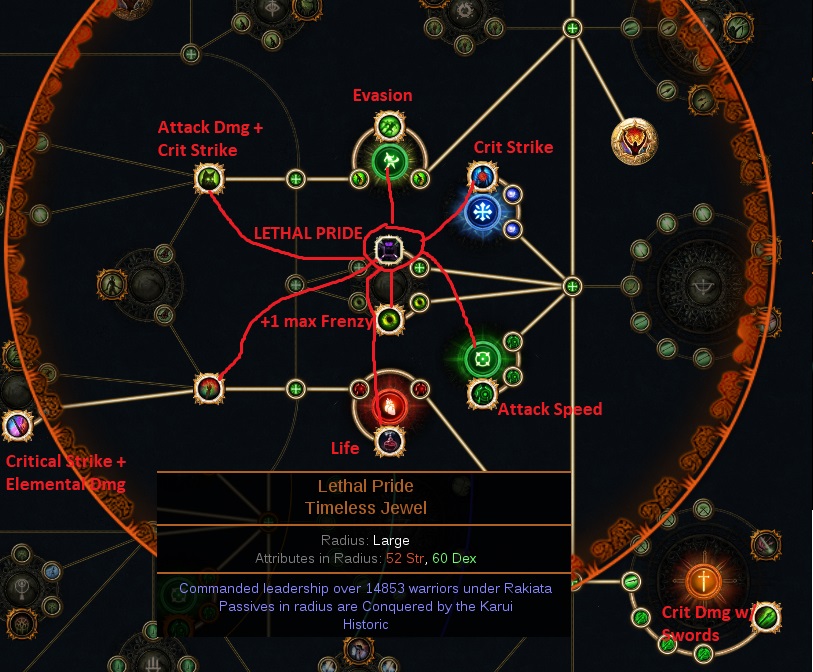 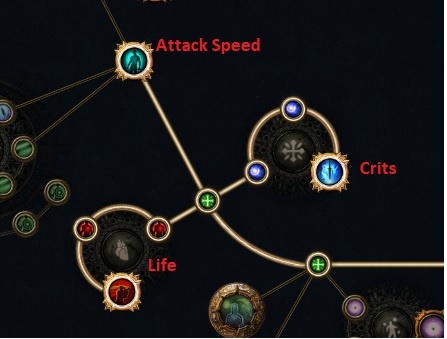 Note: Its up to you to take Tempered by War. I find it useful on my build since I have almost 200% fire resist. It converts 50% of both lightning and cold damage taken to fire damage taken. But when you experiment with gear, you won't have the same elemental resists as me. So Tempered by War is purely optional. Honestly you have a lot of freedom to experiment here. This build is fairly versatile with jewels and notables, as long as you're scaling fire dmg somehow. Passives Ascendancy Points: Commander of Darkness, Plaguebringer, Corpse Pact, Mistress of Sacrifice. Bandits:Kill All Gem Links
스포일러
6L Body: Divergent Flicker Strike > Increased Crit. Strikes > Increased Crit. Damage > Multistrike > Elemental Dmg w/Attacks > Awakened Fire Pen. 6S Oro’s (doesn’t need 6L, just 6S): Ice Golem + Flame Dash + Vitality + Divergent Blood Rage + Vaal Detonate Dead + Enduring Cry We don't really need support gems for Vaal Detonate Dead, because its just a little extra dmg against map bosses. However if you want, you can swap Vitality for a DD support gem. Enduring Cry is also optional but highly recommended, because it gives you instant life heal + Endurance charges. 4L Gloves: Spell Totem > Multiple Totem Support > Desecrate > Faster Casting You could swap Faster Casting for Hypothermia Support, and your Desecrate will actually chill mobs. This is sort of useful in some scenarios. 4S Helmet: Anomalous Anger + Precision + Arctic Armor + Spirit Offering Anomalous Anger is very good because its giving us life leech from elemental damage. Boots (2+2L): CWDT + Molten Shell, Mark on Hit + Assassin’s Mark JEWELS
스포일러
 You want 2 rare jewels with mods like: % increased attack speed % increased fire damage % increased chance to ignite % increased dmg with two handed weapons You also want 2 unique jewels: Mantra of Flames (adds around >200k DPS with all auras running) Lethal Pride (The strength boost is important, but try to find one that will add mods like % increase melee damage, % chance for double damage, % critical strike multiplier, etc). However feel free to experiment with other jewels and report your findings :) Finding a good Lethal Pride is difficult. It's too expensive to slam Divine Orbs now on Lethal Pride to find the mods you want. The random number in the jewel desc. (“Commanded leadership over #xxxx warriors”) is the “seed”. You can enter that number into Path of Building to see what mods it will actually give you. There’s like 8000 seeds, so good luck. GEAR
스포일러
Weapon: Oro’s Sacrifice Oro’s Sacrifice is the “bread and butter” of this build. It's a 2H sword that does pure fire damage. It gives you frenzy charges for igniting enemies, and also has Culling Strike. This allows us to scale Vaal Detonate Dead fire damage alongside our Flicker Strike DPS, with culling strike on map bosses and archnemesis monsters :) Helmet: The Devouring Diadem This is a really sexy helmet, especially with our Desecrate totems. It will passively consume nearby corpses every 5s. With desecrate totems, you’re getting the max heal (4K life) every 5s. It will also proc Undertaker from skill tree (30% dmg increase from consuming corpses). It will make ES protect your mana instead of your health (downside), and reduce mana cost of our auras (upside). This helmet basically lets us run Anger + Precision + Arctic Armor for reduced mana cost, and passively heals us for huge amount. You can buy one for around 15 - 25c on trade. You want it lab enchanted with either Flicker Strike damage boost, or Detonate Dead damage boost. You’ll probably have to run a lot of labs to get one of these enchants, because one already enchanted will cost >1 divine. Body Armor: Any 6L with good elemental resistance rolls. It just needs to be a 6L with good elemental resists for mapping. If you want to spend more money, you can get a Loreweave or something. But overall the 6L + elemental resists are what we really want on body armor, at least for basic mapping and currency farming. Gloves: Meginord’s Vise while leveling, then later additional strike gloves. Meginord’s Vise is the best imo for leveling and early mapping. The passive splash damage adds so much clearing to your flicker strike. Later on when you’ve saved up currency, try to buy a “decent” multistrike gloves (+1 additional strike). But multistrike gloves aren’t cheap, and Meginord’s will last you a long time. Surgebinders are also an option for more single-target damage, and also map mods like "monsters gain frenzy/power". Boots: Gang’s Momentum These boots give us % increased chance to ignite (for our Frenzy sustain), and also 40% dmg against ignited enemies. Big DPS boost for map clearing :) Another option is https://pathofexile.fandom.com/wiki/Corpsewalker boots. These will boost your dmg after consuming corpses, similar to Undertaker node. However the Corpse Walk passive does not proc while using flicker strike. Amulet: Greatwolf Talisman (Attack Dmg + Fire Dmg, anoint Lava Lash) For early leveling/mapping, you can get any decent rare amulet and anoint it with Undertaker, to save yourself a few skill tree points. Later on though, a Greatwolf Talisman with fire dmg + attack dmg rolls is preferable. You’ll want to anoint it with Lava Lash. This will add around ~450k DPS to your flicker strike. Finding a Greatwolf Talisman with those specific rolls shouldn’t be too hard, I got one for 3 chaos. The oil costs for anointing were much more than the amulet. Rings: Polaric Devastation + The Taming Both of these rings add a large amount of DPS. The Polaric ring goes on the left slot for passive “cover enemies in ash when you ignite them”. The Taming gives us more elemental dmg boost, and 10% chance to ignite. Belt: Stygian Vise with strength + elemental resists. You want at least 50 strength and elemental resists. Then you can benchcraft “% increased elemental damage”. For the abyss jewel, find something with “fire damage to attacks” + “fire damage to sword attacks”. Flasks: Life, Diamond, Atziri’s Promise, Wise Oak, Cinderswallow Urn You want corrupted blood immunity on life flask. Diamond flask for crit chance Atziri’s Promise for chaos resist and life leech Wise Oak for fire resist penetration on monsters. Cinderswallow Urn with life gain on kill. Play Style: For the most part, you can zoom around maps on Flicker Strike alone. However, rare / archnem packs will require a bit of finesse. Drop your desecrate totems, cast Spirit Offering (for the crit chance+multiplier) and paint the town red. Your Devourer's Diadem will suck up the rest of the corpses on the ground for big life heals, while also proccing Undertaker damage boost. If you're in a really tight situation, you can kite mob packs into your Vaal Detonate Dead while running in circles, then pick off the survivors with your flicker strike. Blood Rage should always be active, and you will occasionally need to cast Enduring Cry for the instant life heal and endurance charges. On your Atlas skill tree, be sure to get Niko's buff and double shrine effect chance. The 35% damage from Niko's passive, combined with shrines like Echoing + Acceleration is absolutely hilarious on flicker strike. You'll fly off the map and land on the moon. aktillum#3317 님이 2022. 9. 9. 오전 8:35:48에 마지막으로 편집 마지막 추천 2022. 9. 9. 오후 11:42:54
|
|
|
Beginner-friendly and squishy at the same time? A true flicker build, basically 1000000% bait.
I'll try this for fun coz I have nothing better to do anyway. WoefulKnightGuy#6245 님이 2022. 9. 9. 오후 9:01:13에 마지막으로 편집
|
|
" 😂 It's fun I promise, just needs a little work (and a few divine) in the endgame. But for T1 - T12 mapping its a solid breeze. T13 - T16 is reflexes and map mods dependent. |
|


